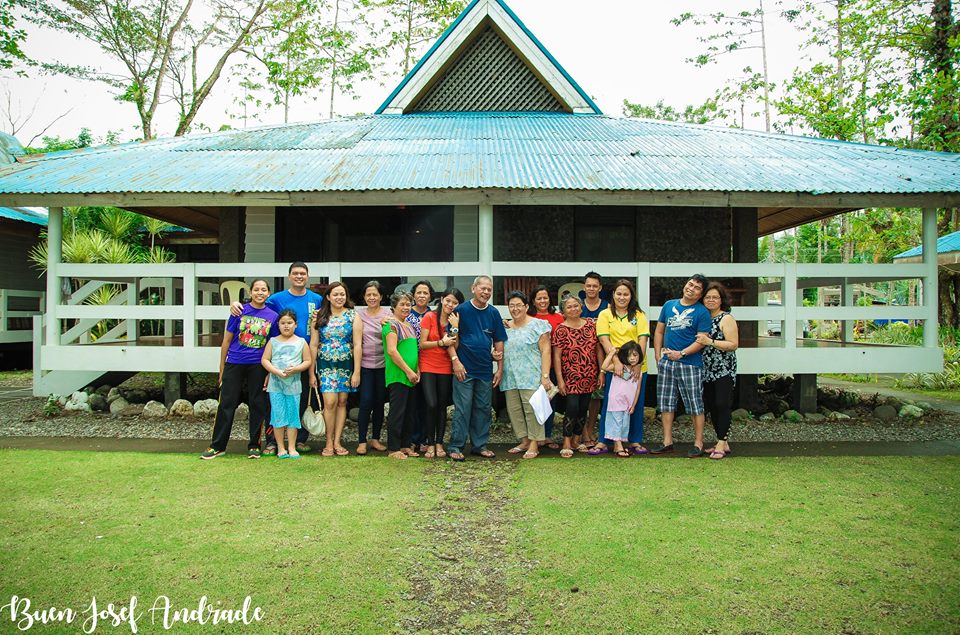
I’ve been lucky enough to be invited to join an artist guild here in my locality Baybay City in Leyte, Philippines. It was such an honor and also a pride to be associated with master artists here. Some of the members are award winning artists and have been painting full-time.
“Dinhi sa Baybay (Here in Baybay): An Art Exhibit” showcases the works of the Visual Arts Association of Baybay (VAAB). The association is composed of up and coming artists and esteemed award-winning artists in Baybay City, Leyte.
The artworks are also for sale at reasonable prices and part of the proceeds will go to charity.
The exhibit is in K of C Building at the Baybay City Veterans Park. Entrance is FREE. This is also a side light of the city’s annual fiesta celebration. The exhibit runs from December 8, 2017 until January 5, 2018.
Sushi (すし, 寿司, 鮨?) is a food preparation originating in Japan, consisting of cooked vinegared rice (鮨飯sushi-meshi?) combined with other ingredients (ネタneta?) such as raw seafood, vegetables and sometimes tropical fruits. Ingredients and forms of sushi presentation vary widely, but the ingredient which all sushi have in common is rice (also referred to as shari (しゃり?) or sumeshi (酢飯?)). (taken from Wikipedia)
In the Philippines, sushi is almost synonymous to Japanese cuisine alongside ramen, tempura, wagyu, and shabu-shabu. Sushi restaurants/bars are aplenty in highly urbanized cities like Manila, Cebu, and Davao but not so much in other cities and in rural areas. I really love sushi (maki and nigiri) that’s why I wanted to learn how to prepare it so I can enjoy sushi anytime here in Leyte. So, the curious side of me started to research how it is prepared. I watched a lot of documentaries and sushi preparation videos on Youtube (I even discovered a really good program about Japanese culture, Begin Japanology with Peter Barakan). I also discovered that sushi-making is a painstaking job and at the same time an edible art. I idolize Sukibayashi Jiro, a Michelin star chef, and Hiroyuki Terada of Nove Kitchen and Bar. If ever I can visit Japan, I would really try the authentic and expensive sushi bars there. After countless hours of watching videos, I thought I should give it a try. At first it is really essential that you have knife skills and lots of patience.
So, here’s how I prepare my sushi.
INGREDIENTS:
Rice – You can use Jasponica rice/Miponica rice. They are available in supermarkets like SM or Robinsons. I bought my rice at Robinsons Supermarket in Ormoc City. It costs about P200 for the 2-kilo pack. In fact, almost all of the ingredients are available at Robinsons Ormoc. Koshihikari rice is also an excellent option since it is imported from Japan but it is more expensive at over P300 for the 2-kilo pack.
Sushi mat – This is also available at Robinsons at P30. The one I bought at Shopwise Cebu is better but I already gave it to my mother.
Crabsticks – An essential ingredient in California maki/sushi roll since it is the meat part of the sushi. It is about P120 for the 250g pack. This is actually a substitute for those who don’t want to eat raw tuna/salmon. You can also prepare this in many ways (more on this later)
Nori Wrap/Seaweed Wrap – An essential ingredient in making sushi. This goes to less than P100 to a little over P120
Other ingredients
Soy sauce (It should be Kikkoman) – Price is around P50 but it can go a long wayHot sauce, to be used for crab salad. Price is around P38Wasabi paste – Price is around P80. There is also a wasabi powder where you will just need to add a little water.Cucumber – Around P10Vinegar – You can use rice wine vinegar but for me the rice wine vinegar is kinda strong. This cheap cane vinegar can do the trick. Price is around P7Mayonnaise for your crab salad – P10A little bit of sesame oil for the netaMangoes (P30)Cling wrap when you are doing the California Maki (P40)Container and ladle for your riceIngredients for making sushi
You also need clean cloth or face towel and a really sharp knife.
Note: Missing ingredients are the Masago or Tobiko and of course some Saku bar Tuna or Salmon (I can’t find them in Ormoc City). Another is the sesame seeds. Avocado is also a key ingredient but I can’t seem to find them at the moment. Maybe they are not in season yet.
How to prepare the rice:
Get 2 cups of the Jasponica rice and rinse well 4 or 5 times until the water is clear. Add 2 cups of water and cook in a rice cooker.
In a bowl, mix 1 cup of vinegar, 2 tablespoons brown sugar, a dash of salt, and few drops of sesame oil.
Once the rice is cooked, transfer it to the container.
Add the vinegar mixture and mix well with the rice.
Fan the rice. Use the ladle in a slicing motion to mix and cool the rice.
Cover with a clean cloth and set aside.
Assembling the sushi:
There are a number of ways to prepare the sushi and a number of combinations of ingredients depending on your preference. First, you must prepare the ingredients beforehand like slicing the cucumber, avocado, crabsticks, and mango. You also need to wrap the sushi mat with cling wrap so that the rice won’t stick on it.
To assemble the sushi, put the sushi mat on an even and firm position.
Use half a sheet or 3/4 sheet of Nori Wrap and put it on top of the sushi mat, smooth side down
With half a sheet Nori, put around 10g of sushi or half the size of your fist over the Nori. This part is tricky if you are still starting. Make sure to wet your hands with water that’s been mixed with vinegar. In this way, you can handle the rice so that it will not stick in your hands. You can also use a spoon to spread the rice sightly but don’t press it to much.
For the 3/4 Nori, you can adjust the amount of rice to put. Again, don’t put too much rice. Just put enough to cover the whole Nori. You can add more ingredients than the half nori.
After that, put your ingredients like 2 pcs. sliced cucumber, 2 pcs. sliced avocado, and a crabstick sliced in half.
Once done, roll the mat and make sure that the sushi is properly rolled and the ends of the Nori overlap.
Spread the rice evenly
This is how it would look like:
Take note of the black ones
Once done, slice the sushi in 8 equal parts using a sharp knife. It is essential that you wipe the knife with a wet towel every after slice so that the sushi will not be ruined when sliced.
For the maki, you can use the same steps but this time invert it such that the rice part will be at the bottom and the nori is on top. Add ingredients and roll. You can also sprinkle with black sesame seeds or roasted sesame seeds.
Combination of ingredients:
There are a lot of ways to combine your filling. Here are my combinations for the maki:
Avocado and crabsticks
Avocado, crabsticks, and cucumber
Avocado and cucumber
Crabsticks and cucumber
Mango only
Avocado and mango
Mango and cucumber
Mango and crabsticks
Mango, avocado, crabsticks, and cucumber (use a whole Nori on this) – futomaki
Crab salad only
Crab salad and mango (use any variation)
Making a crab salad:
Use 3-4 crab sticks and tear them to pieces. Add 2 tablespoons of mayonnaise and 2 tablespoons of hot sauce.
Toppings:
For added flavor and nice presentation, you can put toppings on your sushi. You can put the toppings on the sushi before you slice them in pieces. Once the toppings are in place, cover the whole unsliced sushi with cling wrap and shape it again using your sushi mat. Afterwards, slice it carefully with a wet knife and remove the cling wrap once done.
OK. Here is my current gear in digital photography.
Nikon D80My Nikon D80
Tamron 17-50 mm f2.8 Non-VCNikkor AF-S DX 18-135mm f/3.5-5.6G IF-ED kit lensAF Nikkor 50mm f/1.8DPhotoolex EN-EL3e ChargerGeneric Nikon Camera BagVelbon Sherpa 800R tripod that I borrow from my housemate from time to time
Review:
First off, my Nikon D80 with the 18-135mm kit lens. This was given to me last September 2015. It is a mid-range camera with a shutter count of around 35,000 shots. This is fairly old with around 67% camera shutter life, but hey this was given to me free so it’s already a win-win. I am new to digital photography so I am really optimistic that this is a good starting camera for me and I can improve my craft with this one. I am becoming familiar with its features and have taken note of its good and bad points. I love the layout of the controls in this camera.
Kit lens
The Nikkor AF-S DX 18-135mm f/3.5-5.6G IF-ED is a good kit lens for me. It gives you the extra reach with that 135mm zoom compared to the regular 18-55mm kit lens on the entry-level Nikon D3000, D3100, and D3200. The zoom lens gives you nice portrait shot with a bit of bokeh. It also has a fast autofocus.
Update: Ever since I took it to my field work in Eastern Samar last year, the lens was kinda broken. It can still focus and take picture though but I can’t adjust it from 18-35mm. I think it was damaged when I tried to twist the focus ring, so I might need to use a different lens for the wider angle shots (which is a pain in the neck) if you are in a coverage. I might need to buy another one.
Nikkor Prime 50mm f1.8d
I have researched about this lens and been wanting to have one. The regular price for this is around P5,200 at Macys Camera Shop but I found a used one at Istorya.net for P3,200 so I decided to take a look and see if I like it. I love the crisp image of this lens. Here are some shots I took with this lens.
Tamron 17-50mm f2.8 Non-VC
This is my newest lens. I was lucky enough to have been given this lens as a wedding gift from our wedding sponsor Papie Dirk from Belgium. We’ll, he was the one who gave me the DSLR camera and made me started with digital photography in the first place (again thank you so much Papie for this wonderful gift). Ok! So he was the one who asked me what I wanted as a wedding gift (even hinting if I want a lens). Well, ever since I bought my second-hand Nikkor nifty fifty, I have always wanted to have another fast lens and well within the wide angle range. The first thing that came to my mind when Papie Dirk asked me what lens I want was the Tamron 17-50 non-vc. I like the zoom range of 17-50 and perfect to my style which is street photography, events, and a bit of landscape photography. This lens would really fit in my intended use. And after reading tons of reviews about this lens, I felt in love with it. All these became more evident when I first held it on my hands and took test shots. The quality is crisp and it really has a fast autofocus. Here are some of the shots I took with this lens.
I recently received a very special gift from my elder sister’s father-in-law from Belgium, Dirk, which I really didn’t expect. He gave me his trusted Nikon D80 with an 18-135mm kit lens that he’d been using for years on his trips around the world (lucky me). Hmm. Just what I need to get into digital photography.
In this blog, I will be posting my journey into digital photography, starting from scratch, pouring over books on photography, and watching countless Youtube videos on digital photography. I will also share my experiences and learnings on digital photography as I progress and improve in this craft.
Here are some of my shots t(I’ve chosen these photos since I started barely two months ago) that can be a basis of comparison in the future whether or not I made some progress.
Old Church Ruins in CamiguinMango tree at the backyardTextured wallGuava leaves with bokehPortrait in black and whiteChristmas grooming himselfDomestic departure gates in Mactan International AirportA view aboard a ferry from Balingoan going to Camiguin IslandLuggage conveyor belt at Laguindingan Airport Misamis Oriental